
Introducing Down Payment Functionality on Built
04 Nov, 2025
Built Editorial
07 May, 2024

The built accounting software is an exceptional tool for managing inventory of business. With its amazing features, the application allows businesses to easily keep accurate records of their stocks. Enhancing proper inventory control at a lower cost. Stock management is a crucial aspect of any business. If stock is not managed effectively, it can cause financial losses. There are instances where a business sells one product to different customers, especially when customers make advance payments or deposits for goods they purchase. This inevitably lead to increase in unearned revenues, which the business must account for later. Consequently, although a business might seem to be doing well per its profit and loss statement. In reality, it will be drowning in debt if stock is managed poorly.
The built accounting software solves this problem and other challenges related to stock management, by enabling tracking and maintaining accurate inventory records. Here are the essential tools the built accounting software provides to help businesses effectively manage their stocks and ensure proper inventory control.
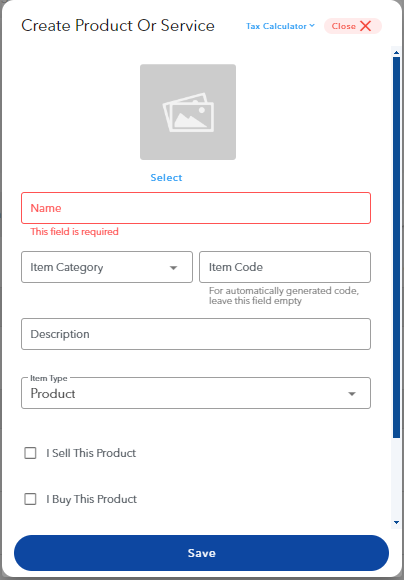
Firstly, let’s learn how to add products to the software by following the steps below:
Top of Form
I. Item Categories: This feature allows users to group products and services based on specific criteria. Users can categorize their products according to factors such as their role in the production process, distinguishing between raw materials and finished goods. The distinction helps in effectively tracking the stock and ensuring proper inventory management.
II. To create an item category, go to the “Item Categories” section on the products and services dashboard. Click on “+ New category”. Enter the name and description for the category, and click “save” to confirm.
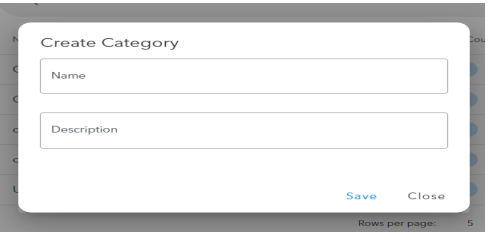
You can also click on the “three-action” button beside every category created to edit the details of the category.
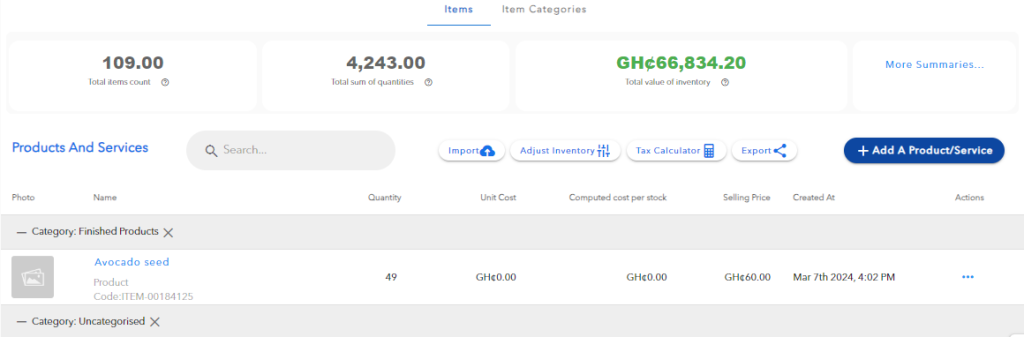
Search: You have the option to search for a product or service by clicking the search button, entering the stock name and pressing enter and the product will be displayed for you.
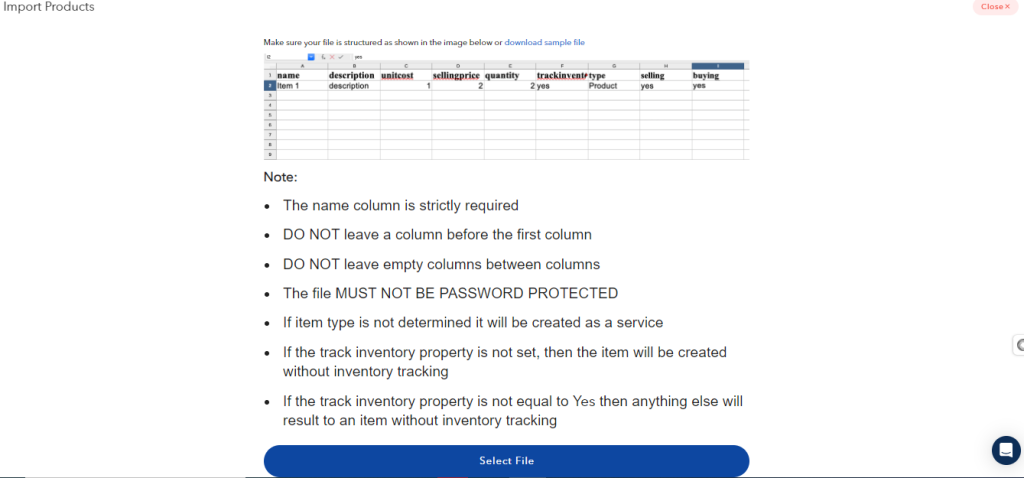
To import a product/service, navigate to the product and service dashboard and click on “Import.” A pop-up window will appear as shown below. Download a sample Excel file by clicking on the “Download Sample File” link in blue.
A preview of the file is displayed below the sample file text. Populate the downloaded sample file with the list of your products and services details in the respective columns as illustrated in the excel sample. Save the file, return to the import page, select the populated sample file by clicking on “Select File,”. You will then click on “Upload” to import your products and services into your account.
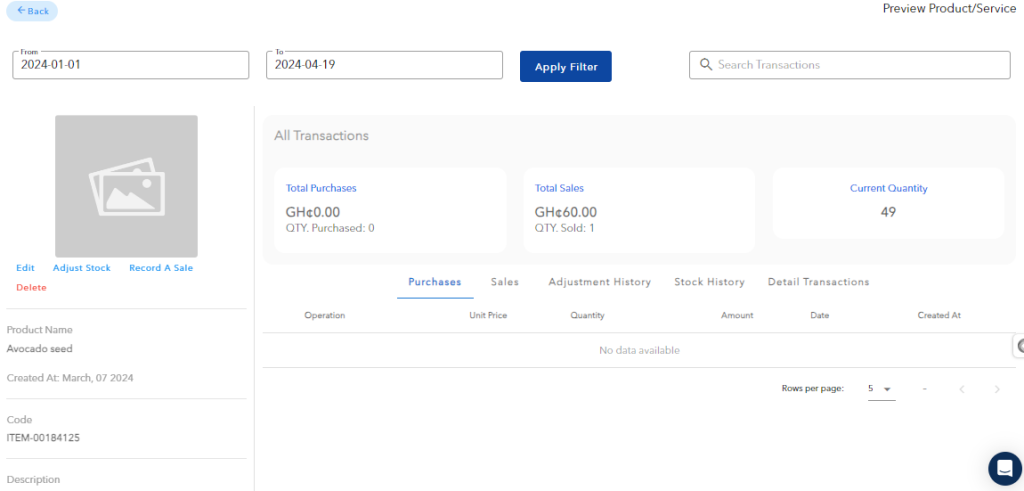
You can also click on the “three dot action” button on the products and service dashboard beside each product created to edit, view details, record a sale or purchase and delete a product or service if there is no transaction attached to it.
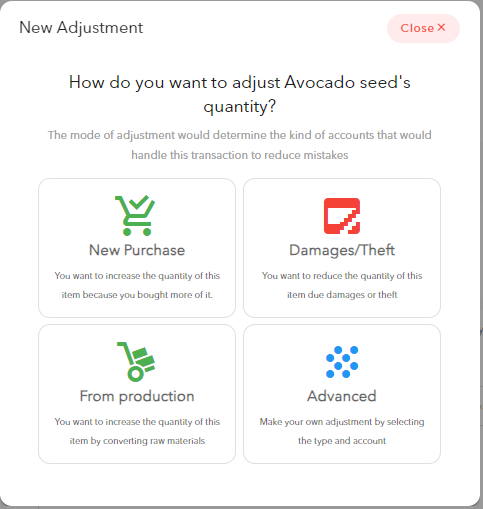
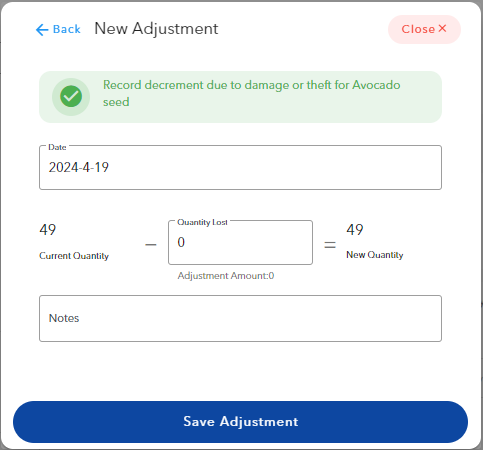
Now that we have created our products, let’s now understand how to make adjustment to our existing product in the software by following the steps listed below. Adjustments include new purchases, converting raw materials to produced products, and reducing products as a result of damage or theft.

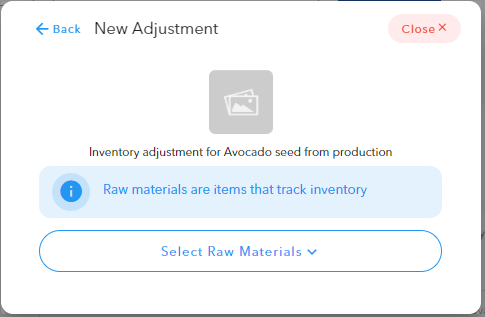
Kindly note that only items that track inventory can be selected as raw materials. So here click on select raw materials and you will see a display of you tracked inventory and select the item that you want to transfer. After that you will see the following display;
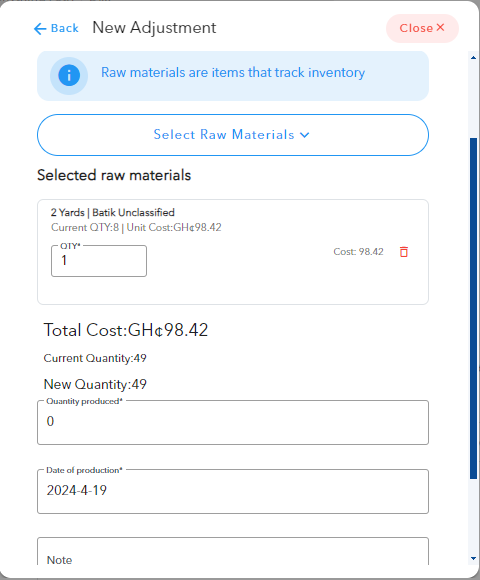
Select raw materials: Here you have the option to add other raw materials you want to convert into finished products.
Effective working capital management is essential to the cashflow management of a business and its survival to some extent. The built accounting software helps with effective inventory management, which is essential to working capital management. Explore a variety of informative articles and stay updated with the rapidly evolving financial landscape!
04 Nov, 2025

29 Aug, 2025

13 Aug, 2025

28 Jul, 2025

25 Jul, 2025

09 Jul, 2025

09 Jul, 2025

01 Jul, 2025

03 Jun, 2025


